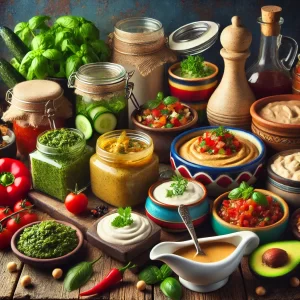
My Favorite Thanksgiving Recipes
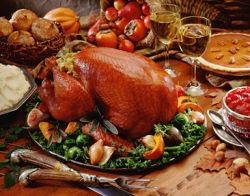
Thanksgiving just wouldn’t be Thanksgiving without dressing, homemade gravy, pumpkin pie and mashed potatoes! This is one day of the year when it’s okay not to diet, because who wants to miss out after you’ve put so much effort into it, right? If you insist, you might be able to find low-fat recipes, but you sure won’t find them here. These are some recipes that I’d like to share with everybody. Some of them are rather different but very tasty!
Oyster Dressing
 This is one I found on What’s Cooking, America. Since I’m a little adventurous when it comes to food and I love seafood, I decided to try it and everybody liked it.
What you’ll need:
- 4 tablespoons butter, divided
- 1 cup chopped onion
- 4 green onions, chopped
- 2 stalks celery, chopped
- Pinch cayenne pepper
- 3 cups crumbled cornbread (I prefer the homemade kind, though you can buy it in the store)
- 3 cups bread crumbs, small dice
- 1/2 cup minced fresh parsley
- Salt and freshly ground pepper to taste
- 2 large eggs, lightly beaten
- 1 pint shucked fresh oysters, drained (reserve 1/2 cup oyster liquid)
How to Shuck Oysters, if anybody’s interested.
Directions:
Preheat oven to 350°. Lightly butter a large rectangular baking pan. Melt two tablespoons of the butter in a large skillet over medium-low heat. Sautée onions and celery in the butter until tender. Remove from heat, add a small pinch of cayenne and let cool. Combine cornbread and breadcrumbs in a large bowl; gently fold in sauteed onions, salt, pepper, and parsley. Add beaten eggs and toss; moisten with the reserved oyster liquid until moist but not soggy. Gently stir in the oysters. Pat the mixture into the prepared baking pan (it should make a 1-inch layer in the pan). Dot with remaining butter and bake about 45 minutes, until golden brown and set in the center. Serve hot; watch your family’s faces when they bite into this unique dressing!
Homemade Turkey Gravy
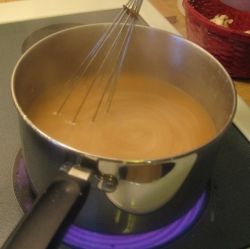 I know Thanksgiving’s a busy day, with stuff going in the oven and all, but you must have homemade turkey gravy for a successful Thanksgiving meal! This one’s another What’s Cooking America recipe, along with tips for making your gravy a success.
-While turkey is cooking, cover the giblets (which include the heart, liver, gizzard and neck), wing tips, and neck bones with water in a large pot.
-If desired, add chopped celery, onion with peel on, parsley, and chopped carrot.
-Add 4 cups of water. Simmer for approximately one hour.
-Remove from heat. Strain broth, discard vegetables, and reserve broth for gravy. Either discard giblets or, if desired, pick meat from neck and wing tips; finely chop all giblets and meat; add to turkey stock when making the gravy.
-When turkey is done cooking, remove the cooked turkey and rack from the roasting pan. Transfer turkey to a platter or board with a lip to collect juices.
-Place roasting pan over two burners on your stove top over medium heat. Always make the gravy in the same pan you used to roast the turkey.
-Skim and discard any excess fat from the juices in the roasting pan. See ingredients below for amount of fat to use in your gravy.
-Using a heavy spoon, scrape all the dark drippings and any crunchy bits from the sides and bottom of roasting pan. Leave them in your roasting pan as these are what add great flavor and a nice rich color to the gravy.
-Add the turkey giblet stock, that you previously made, to the roasting pan.
Turkey gravy ingredients
For each 2 cups gravy desired – use 3 tablespoons fat, 3 tablespoons all-purpose flour, and 2 cups of liquid (poultry juices or broth, vegetable juice, bouillon, and/or water).
Any type of liquid can be added to make gravy, but always use the drippings from the roasting pan and turkey broth to make your turkey gravy. Add other liquids as needed for flavor and quantity of gravy.
In a separate container with a lid, shake together all-purpose flour needed and about 2 cups cool water. This is called a slurry. Adding the thickener (flour) in this way helps to prevent lumps from forming when making your gravy. Once the liquid and drippings in the pan are lightly bubbling, slowly add the slurry mixture to the gravy pan, stirring constantly. If it starts to thicken immediately, stop adding the remaining slurry, you may not need to use the whole amount depending on how much or little drippings were in the pan. If lumps do develop, you should be able to use a wire whisk to remove them.Simmer gently about 10 minutes to cook the flour all the way through (undercooked flour gives off a raw taste). Correct the salt and pepper to taste. Pour the gravy into a warmed sauceboat or wide-mouthed pitcher for serving. Remember that gravy will continue to thicken after it has been removed from the heat.
1-1-1 Sauce and Gravy Formula to get the right consistency without trial and error
To thicken 1 cup of stock, use 1 tablespoon butter and 1 tablespoon flour
Gravy Troubleshooting Tips
Gravy is greasy – If gravy seems greasy, a fat separator should eliminate this problem. If you discover that your gravy is oily toward the end of its preparation, skim off as much fat as possible with a wide-bowled spoon.
Gravy is doughy – If gravy has a doughy or chalky taste, make sure the flour has been cooked long enough. When the flour is added to the pan drippings or butter, whisk constantly while the mixture cooks until it turns a deep golden brown and smells nutty. If the gravy tastes floury when you’re almost finished, turn up the heat to maintain a rapid simmer for several minutes; then thin it again with more stock or water if necessary.
Lumpy gravy – Don’t worry if your gravy has lumps. Just strain the gravy just before serving, using a fine sieve; discard solids. Another quick method is to place the lumpy gravy in your food processor or blender and process until smooth.
Thin gravy –
If gravy is too thin, simmer over medium-high heat, allowing liquid to reduce more.
If your gravy is still too thin, make a paste of equal parts flour and cold water, and add it a little at a time to the prepared gravy, whisking constantly, until the gravy thickens.
You can also blend 1 teaspoon of flour per cup of cold water, and then mix into the prepared gravy. Continue to cook and stir to eliminate the cornstarch flavor.
Thick gravy – If gravy is too thick, gradually whisk in additional stock or water (a little at a time) into the gravy until it reaches desired consistency.
No flavor – If gravy lacks flavor, you should adjust seasoning as necessary with coarse salt and freshly ground pepper. If you use canned stock instead of homemade, the gravy might lack depth of flavor. Homemade stock, even made with chicken rather than turkey, will produce a superior gravy-so it’s worth the effort. A trick that I use, is to cook a whole chicken in water a day or two before Thanksgiving for our dinner. I use the chicken meat for that night’s dinner and refrigerate the chicken stock until Thanksgiving day to use in my gravy.
Salty gravy – If the over salting is severe, the gravy must be repaired by increasing the quantity of gravy. Prepare another batch of gravy, omitting all salt. Blend the two batches together.
Gravy too light in color –
If you brown the flour well before adding the liquid when making gravy, you will avoid pale or lumpy gravy.
You can also make dark gravy with unbrowned flour by making a dark roux. A roux is a thickener made from equal amounts of fat and flour. Heat the fat, add the flour, and cook over medium heat, stirring constantly until the roux becomes a deep brown. When making gravy with the roux, it will not thicken as well, so you will need more of it.
If all the above tips fail in getting your gravy to brown to a rich color or you just want a quick and easy solution, add 1/8 teaspoon instant coffee granules and stir to blend.
Thin gravy can be easily thickened by adding a mixture of either flour and water or cornstarch and water, which has been mixed to a smooth paste. Add gradually, stirring constantly, while ringing to a boil.
Pumpkin Pie with Fresh Pumpkin
 Did you grow pumpkins this year? Make pumpkin pie out of them! Here’s a recipe from AllRecipes.com
Ingredients (per pie):
- 1 medium sugar pumpkin
- 1 tablespoon vegetable oil
- 1 recipe pastry for a 9 inch single crust pie
- 1/2 teaspoon ground ginger
- 1/2 teaspoon ground cinnamon
- 1 teaspoon salt
- 4 eggs, lightly beaten
- 1 cup honey, warmed slightly
- 1/2 cup milk
- 1/2 cup heavy whipping cream
Directions:
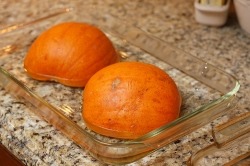
Cut pumpkin in half, and remove seeds. If you like to make fried pumpkin seeds for a snack, save those too and fry them while pies are baking. Lightly oil the cut surface. Place cut side down on a jelly roll pan lined with foil and lightly oiled. It should look something like the picture above. Bake at 325 degrees F (165 degrees C) until the flesh is tender when poked with a fork. Cool until just warm. Scrape the pumpkin flesh from the peel. Either mash, or puree in small batches in a blender. In large bowl, blend together 2 cups pumpkin puree, spices, and salt. Beat in eggs, honey, milk, and cream. Pour filling into pie shell. Bake at 400 degrees F ( 205 degrees C) for 50 to 55 minutes, or until a knife inserted 1 inch from edge of pie comes out clean. Cool on a wire rack.
Mashed Sweet Potatoes
If you’re bored with plain mashed potatoes, this is a colorful and tasty alternative. I found this recipe on AllRecipes.com.
Ingredients:
- 6 sweet potatoes, peeled and cubed
- 3/4 cup milk
- 1/2 cup butter
- 3/4 cup maple syrup
Directions:
Bring a large pot of salted water to a boil. Add cubed sweet potatoes and boil for 20-30 minutes until tender.With an electric mixer, blend the potatoes; slowly add the milk until desired texture is reached. You can use more or less milk as desired. Add butter and maple syrup; blend until smooth. Serve warm.